Automate Invoices From Google Forms
Stop creating invoices manually. Learn 3 methods to automatically create invoices from Google Forms—including zero-code solutions and Apps Script automation.
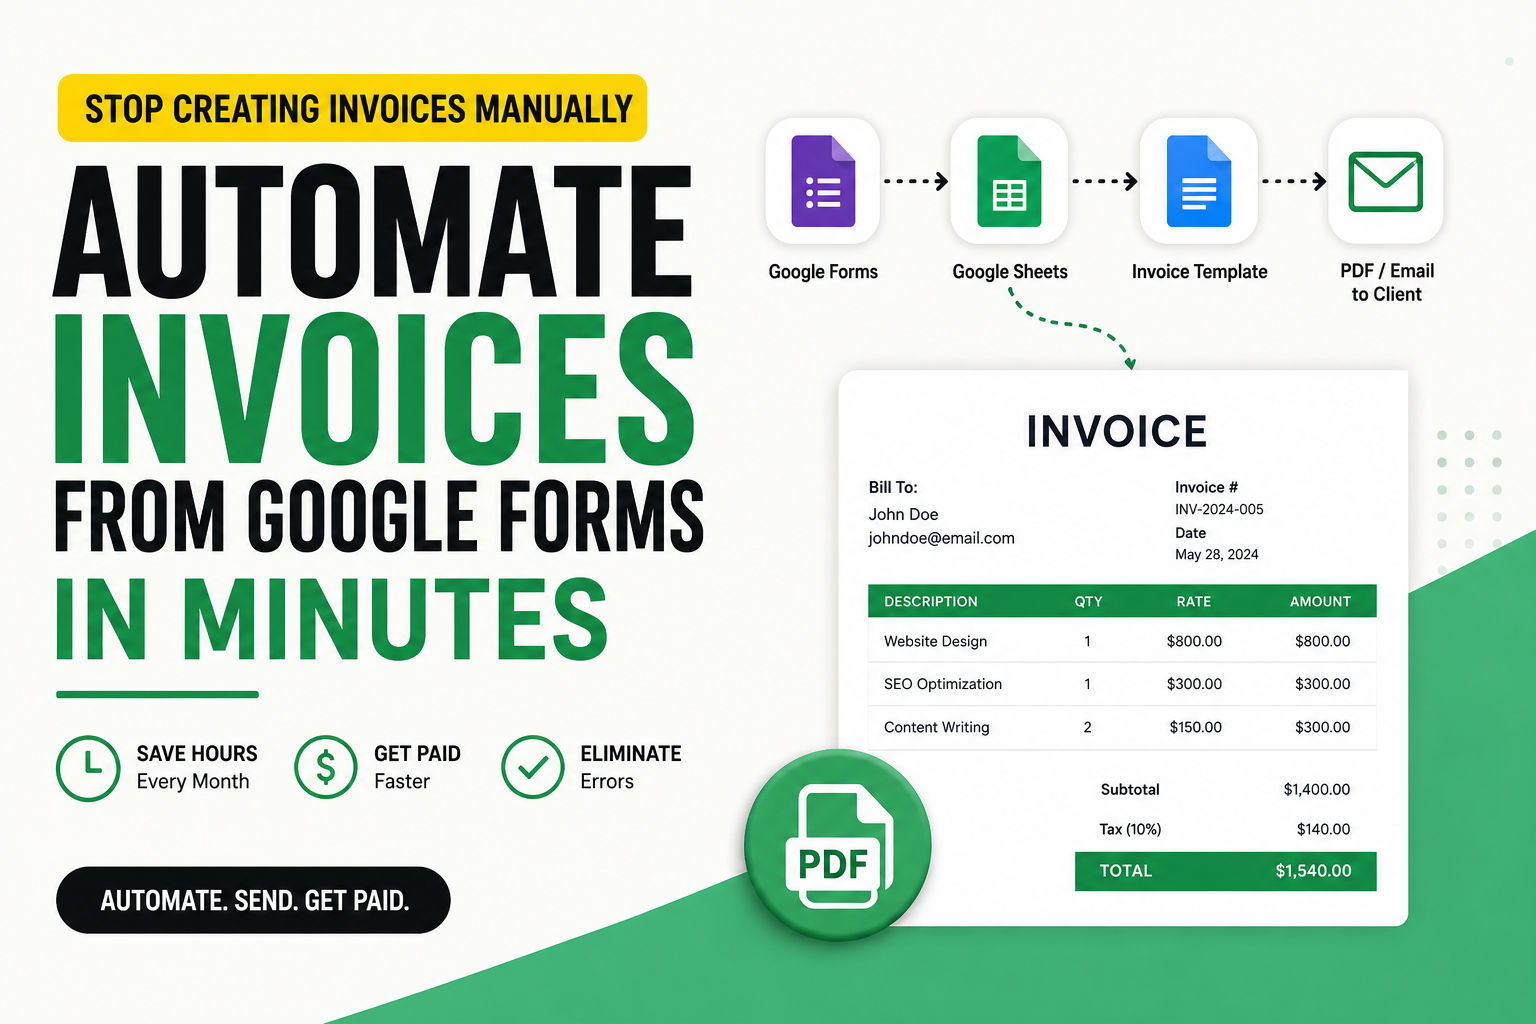
Here's the thing: you can automatically create invoices from Google Forms without paying for expensive invoicing software. Whether you're freelancing, running a small agency, or managing an e-commerce business, manually creating invoices for every client is killing your time and money. This comprehensive guide walks you through three proven methods to automatically create invoices from Google Forms—from zero-code solutions using Google Sheets to advanced automation with Google Apps Script. By the end, you'll have a system that generates professional invoices, sends them automatically to clients, and frees up hours every month.
Why Automate Invoice Creation? It's Not Just About Saving Time
The Time Sink Problem (And Why It's Costing You Real Money)
Manually creating invoices wastes hours every month—time you could spend on actual business work. Walk through the typical freelancer's workflow: you open the last invoice, save a copy, swap client names, update dates, change line items, recalculate totals, cross-check payment terms. Then you worry you missed something. That workflow is fragile, error-prone, and completely unnecessary in 2026.
Let's do some math here. If you send 15 invoices every month and each one takes 20 minutes to create from scratch, that's 300 minutes (5 hours) gone every single month. Over twelve months, that's 60 hours of your billable time spent on pure administrative work. For a freelancer charging $75/hour, that's $4,500 annually—money you're literally leaving on the table just by not automating.
Invoice automation benefits go way deeper than just convenience. When you automatically create invoices from Google Forms, you're eliminating:
- Repetitive manual data entry (the biggest time killer for freelancers and agencies—and the most mind-numbing)
- Math errors that accidentally overbill or underbill clients (and destroy trust)
- Inconsistent formatting that makes your business look unprofessional or like you're just winging it
- Payment delays caused by slow invoice delivery (clients can't pay what they don't receive)
- Admin overhead that pulls focus from actual revenue-generating work
- Invoice version chaos (which version did I send? was it the updated one?)
- Missing invoices from busy periods when you forget to bill someone entirely
The Money Story: Fast Invoices = Fast Payments
Here's a fact that changed how I think about invoicing: fast, accurate invoices get paid significantly faster. Businesses with streamlined invoice processes see payment arrive 3-5 days quicker than those stuck in manual workflows.
Let that sink in. If you're invoicing $5,000/month and typically get paid on day 25, automating could have you paid by day 20. That's 5 extra days of cash flow every single month. For a small agency doing $50,000 monthly in billings, that's a $8,000 cash flow improvement (one extra month of revenue in the bank). That's not theoretical—that's real money.
Plus, reduce invoice automation errors and you're protecting revenue. One misplaced decimal point (sending an invoice for $5,00 instead of $5,000), a forgotten line item, or a wrong tax calculation can cost hundreds or even thousands. An automation system removes this human error entirely because the data flows directly from your form into the template. No transcription mistakes. No typos.
The Professional Image Factor
There's something else happening when you send invoices instantly after a project concludes: your clients perceive you as professional, organized, and on top of things. Compare that to the freelancer who says "I'll send you an invoice tomorrow" and then sends it three days later (or forgets entirely). Which one gets rehired?
Automatic invoicing from Google Forms sends a signal: this person has their business dialed in. They're not scrambling. They're professional. Hire them again.
The Three-Method Roadmap: What Works for Your Skill Level
Before we dive deep into each method, let's map out your options. You've got choices—and they range from "I don't know JavaScript" to "I eat APIs for breakfast."
| Method | Skill Level | Setup Time | Cost | Customization |
|---|---|---|---|---|
| Method 1: Google Sheets + Docs + Add-on | Beginner | 30 min | Free | Medium |
| Method 2: Google Apps Script | Intermediate/Advanced | 45-90 min | Free | High |
| Method 3: Third-Party Tools | Beginner | 15-20 min | $19-828/mo | Medium-High |
Pick the one that matches your comfort level. You can always upgrade later.
Method 1: The Accessible Path (Google Forms + Google Sheets + Google Docs + Add-On)
This method requires zero coding knowledge. You link a Google Form to a Google Sheet, create an invoice template in Google Docs, and use an add-on to generate invoices automatically. It's the easiest way to create invoices from Google Forms for beginners, and it's powerful enough for most small business needs.
Who this works for: Freelancers, service providers, consultants, small agencies just getting started, anyone who wants zero-code automation.
What you need:
- A Google Account (personal or Workspace)
- A Google Form (to collect client and invoice data)
- A Google Sheet (to store responses)
- A Google Docs invoice template (your invoice design)
- An add-on like Document Generator, Autocrat, or Form Publisher
Why this method wins:
- Zero coding—literally just clicking and copying
- Free (no subscription costs)
- Runs instantly when forms are submitted
- Professional results
- Easy to troubleshoot (it's all visual)
Step 1: Build Your Google Form (The Data Collection Machine)
Open Google Forms and create a new blank form. Give it a professional name like "Invoice Request" or "Service Order Form."
Now add these fields as questions. Use the appropriate question type for each:
Client Information Section:
- "Client/Customer Name" (Short answer)
- "Business Name (if applicable)" (Short answer)
- "Email Address" (Short answer)
- "Phone Number" (Short answer)
- "Billing Address" (Paragraph)
Invoice Details Section:
- "Invoice Date" (Date picker)
- "Due Date" (Date picker)
- "Invoice Number" (Short answer—or you can auto-generate this later)
Line Items Section:
- "Description of Work/Product" (Paragraph—this could be multiple services)
- "Quantity" (Number)
- "Rate per Unit ($)" (Number)
- "Total Amount Due ($)" (Number—let them calculate or you can auto-calculate with a script)
Additional Information:
- "Special Notes or Terms" (Paragraph—optional)
- "Preferred Payment Method" (Multiple choice: Bank Transfer, PayPal, Credit Card, etc.)
The form design tip: Make most fields required (toggle the "Required" switch). You don't want partial invoices floating around. Test-submit the form yourself to make sure it feels natural.
Step 2: Connect Form to Google Sheets (Automatic Data Capture)
When you create a Google Form, there's an automatic option to send responses to a Google Sheet. Click the Responses tab in your form, then click the green Create Spreadsheet button. This generates a new Google Sheet that captures every form submission as a row.
Now you have a data source. Every time someone fills out your form, their information automatically appears in this sheet. This is where the add-on will pull data from.
Step 3: Design Your Invoice Template in Google Docs (The Professional Presentation)
Create a new Google Doc. This will be your invoice template—the design that every invoice will follow.
Here's what a solid invoice template includes:
Header Section:
- Your company logo (if you have one)
- Your company name and details
- "INVOICE" as a clear heading
- Invoice number (placeholder: )text
{{INVOICE_NUMBER}} - Invoice date (placeholder: )text
{{INVOICE_DATE}}
Client Information Section:
- "Bill To:"
- Placeholder fields: ,text
{{CLIENT_NAME}},text{{CLIENT_EMAIL}},text{{CLIENT_PHONE}}text{{BILLING_ADDRESS}}
Line Items Table:
| Description | Quantity | Rate | Amount |
| {{DESCRIPTION}} | {{QUANTITY}} | {{RATE}} | {{AMOUNT}} |
Summary Section:
- Subtotal: text
{{SUBTOTAL}} - Tax (if applicable): text
{{TAX}} - Total Due: (make this bold and large)text
{{TOTAL_AMOUNT}}
Payment Information Section:
- Payment Methods (Bank transfer, PayPal, etc.)
- Due Date: text
{{DUE_DATE}} - Special Terms: text
{{NOTES}}
Footer:
- Your company contact info
- Website/social media
- "Thank you for your business!"
Template design best practices:
- Use consistent formatting (don't mix fonts wildly)
- Make placeholders obvious but not distracting—is cleartext
{{PLACEHOLDER}} - Keep company branding static (don't make your logo a placeholder)
- Use tables for line items so the script can populate them cleanly
- Leave white space—cramped invoices look unprofessional
Step 4: Install a Document Generation Add-On
Go to your Google Form and click the three-dot menu, then select "Get Add-ons." Search for one of these popular options:
Document Generator (Most popular, easiest setup)
- Free version available
- Works directly with Google Sheets and Google Docs
- Simple visual interface
- Can send emails automatically
Autocrat (Legacy but still works)
- Reliable for years
- Good for complex invoicing scenarios
- Requires more configuration
Form Publisher (Specialized for this exact use case)
- Built specifically for turning form responses into documents
- Automatic email delivery included
- Slightly more setup but very powerful
Install one of these, authorize it with your Google Account, and follow the setup wizard.
Step 5: Map Form Fields to Template Placeholders
The add-on will ask you to map your Google Sheet columns to your Google Docs template placeholders. This is where the magic happens.
The add-on essentially says: "When a new row appears in Google Sheets, find all the placeholders in Google Docs and replace them with data from that row."
For example:
- Google Sheet Column A (Client Name) → Replace in templatetext
{{CLIENT_NAME}} - Google Sheet Column B (Invoice Date) → Replace in templatetext
{{INVOICE_DATE}} - Google Sheet Column C (Total Amount) → Replace in templatetext
{{TOTAL_AMOUNT}}
Set these mappings up carefully. Copy/paste the placeholder text to ensure perfect matches (no extra spaces or typos).
Step 6: Configure Email Delivery (Optional But Powerful)
Most document generation add-ons let you send the generated invoice directly to the client's email. Set this up by:
- Specifying the email column from your Google Sheet (the client's email)
- Writing a template email message ("Please find your invoice attached")
- Deciding whether to send immediately or wait for approval
Step 7: Test the End-to-End Workflow
This is critical. Don't skip testing.
- Fill out your Google Form with real test data (use a fake client name or your own name)
- Watch the response appear in Google Sheets
- Check that the add-on triggered (there's usually a log or notification)
- Open Google Drive and look for the generated invoice
- Review it for formatting, data accuracy, calculations
- Check your email to confirm the invoice arrived (if you set up email delivery)
Common things to test:
- Do special characters (apostrophes, ampersands) display correctly?
- Are currency amounts formatted right ($1,234.56 not 1234.56)?
- Is the PDF quality professional-looking?
- Does the email arrive in the inbox (not spam)?
The payoff: When a client fills out your form, an invoice is generated and emailed to them within seconds. No manual work on your end. They can see their invoice immediately and pay faster.
Method 2: The Powerful Approach (Google Apps Script for Maximum Control)
This method needs some coding comfort, but it's incredibly flexible and powerful. Google Apps Script is a JavaScript-based automation language built directly into Google Workspace. It lets you create custom invoice generation that's far more sophisticated than add-ons allow.
Who this works for: Developers, technical project managers, or entrepreneurs comfortable reading and modifying code.
What you need:
- A Google Form (to collect data)
- A Google Sheet (to store responses)
- A Google Docs invoice template
- Basic JavaScript knowledge (or willingness to copy/paste and modify code)
- Google Apps Script editor (built into Google Sheets)
Why this method wins:
- Complete control over the automation logic
- Can handle complex calculations (discounts, taxes, multi-line items)
- PDF generation built-in
- Email automation with customization
- Recurring invoice support
- Payment tracking integration
- Conditional logic (e.g., rush fees, bulk discounts)
Real-world use case: A web design agency that wants to automatically generate invoices for projects, attach a PDF, email the client AND log the invoice number in a master list, then set a payment reminder for 10 days before due date.
Understanding Google Apps Script Basics
Google Apps Script is essentially JavaScript that runs in Google's cloud. It has special functions that let you interact with Google Sheets, Docs, Gmail, and Drive.
The key functions you'll use:
SpreadsheetApp — Controls Google Sheets
1const sheet = SpreadsheetApp.getActiveSpreadsheet().getActiveSheet();
2const data = sheet.getDataRange().getValues(); // Get all sheet data
DocumentApp — Controls Google Docs
1const doc = DocumentApp.openById(docId);
2const body = doc.getBody();
3body.replaceText('{{PLACEHOLDER}}', 'actual value'); // Replace text
GmailApp — Sends emails
1GmailApp.sendEmail('client@example.com', 'Your Invoice', 'message', {
2  attachments: [pdf] // Attach a PDF
3});
DriveApp — Creates/manages files
1const pdf = DriveApp.getFileById(docId).getAs('application/pdf');The Complete Apps Script Workflow (Step-by-Step)
Step 1: Set Up Your Template Document
Create a Google Docs template exactly like Method 1, but with careful placeholder naming:
- text
{{CLIENT_NAME}} - text
{{INVOICE_DATE}} - text
{{DUE_DATE}} - text
{{TOTAL_AMOUNT}} - etc.
Copy the Document ID from the URL. You'll need this in your script.
Step 2: Open Google Apps Script
Go to your Google Sheet (the one connected to your form), then click Extensions > Apps Script. This opens the script editor.
Step 3: Write the Invoice Generation Function
Here's a real, working script you can modify for your needs:
1// Configuration (change these values)
2const TEMPLATE_DOC_ID = 'YOUR_GOOGLE_DOC_ID_HERE'; // Replace with your template's ID
3const INVOICES_FOLDER_ID = 'YOUR_GOOGLE_DRIVE_FOLDER_ID'; // Where PDFs go
4const SHEET_NAME = 'Form Responses 1'; // The sheet with form data
5
6function generateInvoicesFromFormResponses() {
7  const sheet = SpreadsheetApp.getActiveSpreadsheet().getSheetByName(SHEET_NAME);
8  const data = sheet.getDataRange().getValues();
9
10  // Start from row 2 (skip header row)
11  for (let i = 1; i < data.length; i++) {
12    const row = data[i];
13
14    // Extract data from each column
15    const clientName = row[0];      // Column A
16    const email = row[1];            // Column B
17    const invoiceDate = row[2];      // Column C
18    const dueDate = row[3];          // Column D
19    const description = row[4];      // Column E
20    const quantity = row[5];         // Column F
21    const rate = row[6];             // Column G
22    const totalAmount = row[7];      // Column H
23    const notes = row[8];            // Column I
24
25    // Skip if already processed (optional check)
26    if (row[10] === 'PROCESSED') continue;
27
28    // Create invoice for this row
29    createInvoice(clientName, email, invoiceDate, dueDate,
30                  description, quantity, rate, totalAmount, notes);
31
32    // Mark as processed
33    sheet.getRange(i + 1, 11).setValue('PROCESSED');
34  }
35}
36
37function createInvoice(clientName, email, invoiceDate, dueDate,
38                       description, quantity, rate, totalAmount, notes) {
39  try {
40    // Make a copy of the template
41    const templateDoc = DriveApp.getFileById(TEMPLATE_DOC_ID);
42    const invoiceCopy = templateDoc.makeCopy(`Invoice - ${clientName} - ${invoiceDate}`);
43    const docId = invoiceCopy.getId();
44
45    // Move to invoices folder
46    const folder = DriveApp.getFolderById(INVOICES_FOLDER_ID);
47    invoiceCopy.moveTo(folder);
48
49    // Open and edit the document
50    const doc = DocumentApp.openById(docId);
51    const body = doc.getBody();
52
53    // Replace all placeholders
54    body.replaceText('{{CLIENT_NAME}}', clientName);
55    body.replaceText('{{EMAIL}}', email);
56    body.replaceText('{{INVOICE_DATE}}', invoiceDate);
57    body.replaceText('{{DUE_DATE}}', dueDate);
58    body.replaceText('{{DESCRIPTION}}', description);
59    body.replaceText('{{QUANTITY}}', quantity.toString());
60    body.replaceText('{{RATE}}', '$' + parseFloat(rate).toFixed(2));
61    body.replaceText('{{TOTAL_AMOUNT}}', '$' + parseFloat(totalAmount).toFixed(2));
62    body.replaceText('{{NOTES}}', notes);
63
64    doc.saveAndClose();
65
66    // Convert to PDF
67    const pdf = invoiceCopy.getAs('application/pdf');
68
69    // Send email with PDF
70    GmailApp.sendEmail(
71      email,
72      `Invoice from Your Company - ${invoiceDate}`,
73      `Dear ${clientName},\n\nPlease find your invoice attached. Due date: ${dueDate}\n\nThank you for your business!\n\nBest regards,\nYour Company`,
74      { attachments: [pdf] }
75    );
76
77    Logger.log(`Invoice created and emailed to ${email}`);
78  } catch (error) {
79    Logger.log(`Error processing ${clientName}: ${error}`);
80  }
81}
82
83// Run this function when the form is submitted (optional automation)
84function onFormSubmit(e) {
85  generateInvoicesFromFormResponses();
86}
Step 4: Connect the Script to Form Submissions (Optional Automation)
To run this automatically when someone submits your form:
- In the Apps Script editor, click the clock icon (Triggers)
- Click Create new trigger
- Set it up as:
- Function: text
onFormSubmit
- Event source: text
From form
- Event type: text
On form submit
- Function:
Now every time someone fills out your form, this script runs automatically and generates the invoice.
Step 5: Run Manually (During Testing)
Before setting up auto-triggers, test manually:
- Fill out your Google Form with test data
- In the Apps Script editor, select function from the dropdowntext
generateInvoicesFromFormResponses
- Click the Run button (play icon)
- Check Google Drive for the generated invoice
- Check your email for the invoice attachment
Advanced Features You Can Add
Once you have the basics working, these upgrades are simple:
Auto-Incrementing Invoice Numbers:
1const invoiceNumber = parseInt(sheet.getRange(1, 12).getValue() || '1000') + 1;
2sheet.getRange(1, 12).setValue(invoiceNumber);
3body.replaceText('{{INVOICE_NUMBER}}', invoiceNumber.toString());
Tax Calculations:
1const taxRate = 0.08; // 8% tax
2const subtotal = totalAmount;
3const tax = subtotal * taxRate;
4const grandTotal = subtotal + tax;
5body.replaceText('{{SUBTOTAL}}', '$' + subtotal.toFixed(2));
6body.replaceText('{{TAX}}', '$' + tax.toFixed(2));
7body.replaceText('{{GRAND_TOTAL}}', '$' + grandTotal.toFixed(2));
Payment Tracking:
1// Log invoice details to a separate tracking sheet
2const trackingSheet = SpreadsheetApp.getActiveSpreadsheet().getSheetByName('Invoice Log');
3trackingSheet.appendRow([
4  invoiceNumber,
5  clientName,
6  email,
7  totalAmount,
8  invoiceDate,
9  dueDate,
10  'Sent'
11]);
Method 3: Third-Party Tools (Zapier, Pabbly, Portant—No Coding Required)
Sometimes you want automation without touching code. Zapier, Pabbly Connect, and Portant all let you connect Google Forms to invoice generation with a visual workflow builder.
How these platforms work:
- Connect Google Forms as a trigger. When someone submits the form, the automation fires.
- Map data to your invoice template. Customer name → template field, amount → template field, etc.
- Generate and send. The tool creates a professional invoice and emails it automatically.
Tool Comparison:
| Tool | Best For | Cost | Setup Speed | Custom Templates |
|---|---|---|---|---|
| Zapier | Large teams, complex workflows | $25–$828/mo (task-based) | 10 min | Yes (limited) |
| Pabbly Connect | Budget-conscious solos/small teams | $19–$79/mo (or $699 lifetime) | 10 min | Yes |
| Portant | Simple no-code automation | Free–$29/mo | 5 min | Yes |
Pros of third-party tools:
- Widest app integrations (Zapier connects 7,000+ apps)
- Visual workflow builder (no code needed)
- Built-in templates for common invoicing scenarios
- Professional support and documentation
Cons:
- Monthly recurring costs add up
- Less control over template customization than native Google solutions
- Per-task pricing (Zapier) or workflow limits on some plans
When to choose this approach: You're running 10+ invoices monthly and want a turnkey solution with professional support.
Best Practices for Google Forms Invoice Automation
Design Your Form for Success
Your form is the foundation. Make your Google Forms invoice template questions crystal clear because bad data in = bad invoices out.
Include these essential fields:
- Customer name and email (mandatory)
- Invoice date (auto-populate with today's date)
- Due date (dropdown with standard terms: Net 30, Net 60, etc.)
- Service description or product list
- Quantity and unit price
- Tax rate (if applicable)
- Any discounts or additional fees
Use form validation. Google Forms lets you set requirements—email must be a valid email address, numbers must be actual numbers. This catches errors before they reach your invoice.
Template Design Matters More Than You Think
Your invoice template needs to balance professional appearance with automation. Here's what works:
- Use clear placeholders. Something like is unmistakable when the script searches for ittext
{{CUSTOMER_NAME}} - Keep static content static. Your company logo, address, payment instructions—these don't change. Don't put them in placeholders
- Use tables for line items. If you're invoicing for multiple services, use a table that the script can populate row-by-row
- Include payment instructions clearly. Bank transfer? PayPal? Stripe? Make it obvious so clients actually pay you
- Brand consistency. Use your company colors, fonts, and logo. A professional-looking invoice builds trust
Automate Repetitive Data
Some data doesn't need to come from the form—it's always the same. Your company name, tax ID, invoice number sequence. Have the script generate invoice numbers automatically or pull them from a master list.
Auto-generating invoice numbers prevents duplicates and keeps your accounting clean.
Document Your System
Create a simple one-page reference guide for your team (or future self) that explains:
- Where the Google Form lives
- Which Google Sheet stores responses
- Where invoices are saved in Drive
- How to troubleshoot common issues
- Contact info for add-on support if needed
This prevents confusion down the line and makes the system maintainable.
Test Everything Before Going Live
Submit at least three test invoices through your automated system before you trust it with real clients. Check:
- All form data appears in the invoice
- Calculations are correct
- Formatting looks professional
- PDFs generate without errors
- Emails arrive in spam-free inboxes
- No placeholder text remains in final invoices
Troubleshooting Common Issues
"My invoice template isn't populating with form data"
Likely cause: Placeholder text doesn't match exactly. If your template says
{{CustomerName}}{{Customer Name}}Fix: Use a consistent placeholder format everywhere. Copy/paste placeholders from your script into your template to ensure exact matches. Test with one placeholder first before connecting multiple fields.
"Google Apps Script keeps timing out"
Likely cause: Your script is processing too many invoices at once or making too many API calls.
Fix: Add delays between processing. Google Apps Script includes a
Utilities.sleep()
1Utilities.sleep(500); // Wait 500 milliseconds between API calls"Emails aren't being sent"
Likely cause: The email address field is empty in some form submissions, or Gmail thinks the automation is suspicious and blocking it.
Fix:
- Make email mandatory in your form
- Run the script from a Google Workspace account (more permissions)
- Check Gmail's security settings—you might need to approve the script as a trusted app
- Add error logging to see exactly where the script fails
"The PDF looks terrible"
Likely cause: Your Google Docs template has formatting issues that don't convert cleanly to PDF.
Fix: Test your template's PDF export before connecting it to automation. Use simple formatting—minimize custom fonts, complex layouts, and embedded images. Google's built-in fonts (Arial, Calibri, Times New Roman) convert most reliably to PDF.
"My invoice numbers are duplicating"
Likely cause: The processing flag isn't working or the script runs multiple times for the same submission.
Fix: Add a unique identifier to each row and check it before processing. Store the invoice number in the spreadsheet immediately after generation to prevent re-processing.
When to Stop Using Forms and Level Up
Google Forms invoice automation is powerful, but it has limits.
After about 50+ invoices monthly, you might notice friction:
- Managing templates becomes tedious
- You can't easily track which invoices are paid
- Scaling to multiple invoice types gets complicated
- You need features like recurring invoices or payment reminders
- Integration with accounting software becomes necessary
That's when you graduate to dedicated invoicing software like Wave, FreshBooks, or QuickBooks that connects directly to your accounting system. But until then? Google Forms + automation handles everything a freelancer or small team needs.
Here's the thing: Even after you upgrade to professional invoicing software, you can often still use Google Forms as your data entry point, just piping that data into a more robust backend. So nothing you build here is wasted.
The Real Win: Getting Your Time Back
The math is simple. If you spend 15 minutes creating each invoice and you send 20 invoices monthly, that's 5 hours/month. Over a year, that's 60 hours of your life gone to repetitive data entry.
Automating invoice creation from Google Forms gives you those hours back. Your clients get their invoices faster. You get paid faster. Everyone wins.
You don't need expensive software, complex integrations, or a developer on staff. Pick the method that matches your skills, set it up once, and never manually create an invoice again.
The first invoice you auto-generate will feel like magic. The hundredth one will feel normal. That's success.
Most People Asked
CS student and builder writing about tech, startups, AI, and productivity. Built a SaaS that didn't ship — walked away with real product experience instead. Sharing everything learned along the way.